hexo+butterfly博客功能完善和美化(二) 参考博客:
hexo的butterfly主题美化,2024年初版_hexo 主题-CSDN博客
【Hexo】Hexo搭建Butterfly主题并快速美化_hexo butterfly-CSDN博客
Butterfly 主题的详细配置 | 梁圣磊の博客
基于 Hexo 键入搜索功能 | 唐志远
笔者也是兜兜转转,能用的不能用的,有bug的没bug的都试了一遍,我写的这些都是我实现了的,没实现的都没写,要是有坑的话我一般也会贴上我是咋弄的
1.看板娘添加 具体步骤 前往博客根目录,打开cmd命令窗口执行npm install --save hexo-helper-live2d。
1 npm install --save hexo-helper-live2d
输入以下命令,下载相应的模型, 替换成你想要的模型名称即可,更多模型选择请点击此处 ,各个模型的预览请访问原作者 或者Hexo添加Live2D看板娘+模型预览-CSDN博客
1 npm install --save live2d-widget-model-shizuku
修改站点配置文件_config.yml,添加如下代码:
1
2
3
4
5
6
7
8
9
10
11
12
13
14
15
live2d: enable : true scriptFrom: local tagMode: false debug: false model: use: live2d-widget-model-shizuku display: position: right width: 150 height: 300 hOffset: 20 vOffset: -20 mobile: show: false
重新编译运行,即可看到效果。
2.字数统计
安装插件:在你的博客根目录,打开 cmd 命令窗口执行 npm install hexo-wordcount --save。
开启配置:修改主题配置文件_config.butterfly.yml 中的 wordcount。
1
2
3
4
5
wordcount: enable: true post_wordcount: true min2read: true total_wordcount: true
打开一篇博客即可看到如下效果
3.统计访问人数 (UV 和 PV) 详细信息请查看 busuanzi 官方网站 。
Butterfly很贴心地集成了不蒜子 计数工具,可以统计网站的访问数据(人数,次数等)。只需要修改主题配置文件即可开启。
修改主题配置文件_config.butterfly.yml。
1
2
3
4
busuanzi: site_uv: true site_pv: true page_pv: true
4.社交图标 Butterfly 支持 font-awesome v6 图标。
修改主题配置文件_config.butterfly.yml。
书写格式:图标名:url || 描述性文字。
1
2
3
4
social: fab fa-github: https://github.com/Darling-123456 || Github || '#24292e' fa fa-book-open: https://blog.csdn.net/m0_74795952?type=blog || CSDN fas fa-envelope-open-text: mailto:2214050255@qq.com || Email || '#4a7dbe'
这个笔者看了看别人的,qq微信啥的其实也没啥用,感觉有这几个就够用了
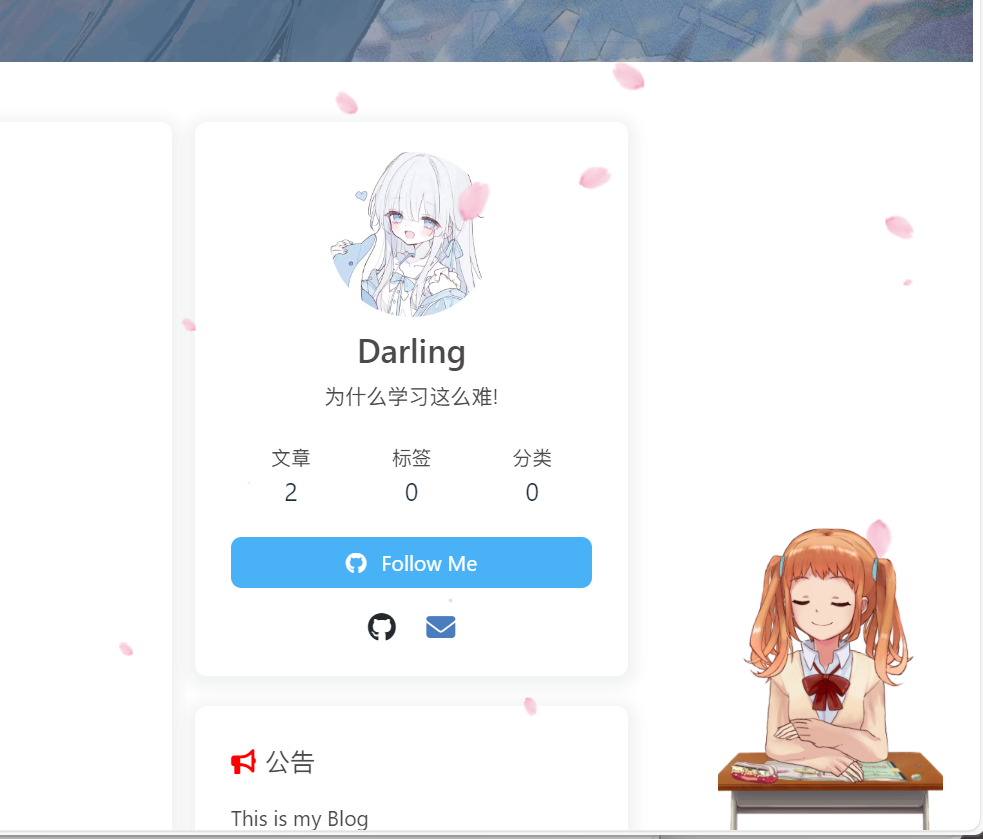
5.侧边栏排版 可自行决定哪个项目需要显示,可决定位置,也可以设置不显示侧边栏。
修改主题配置文件_config.butterfly.yml。
1
2
3
4
5
6
7
8
9
10
11
12
13
14
15
16
17
18
19
20
21
22
23
24
25
26
27
28
29
30
31
32
33
34
35
36
37
38
39
40
41
42
43
44
aside: enable: true hide: false button: true mobile: true position: right card_author: enable: true description: button: enable: true icon: fab fa-github text: Follow Me link: https://github.com/xxxxxx card_announcement: enable: true content: This is my Blog card_recent_post: enable: true limit: 5 sort: date sort_order: card_categories: enable: true limit: 8 expand: none sort_order: card_tags: enable: true limit: 40 color: false sort_order: card_archives: enable: true type: monthly format: MMMM YYYY order: -1 limit: 8 sort_order: card_webinfo: enable: true post_count: true last_push_date: true sort_order:
6.打字效果 传送门:activate-power-mode 。
修改主题配置文件_config.butterfly.yml。
1 2 3 4 5 6 7 activate_power_mode: enable: false colorful: true shake: true mobile: false
7.分享功能 addThis、sharejs、addtoany三个选一个开启
addThis官网:https://www.addthis.com/
1 2 3 4 5 6 7 8 9 10 11 12 13 14 15 16 17 18 19 20 addThis: enable: false pubid: sharejs: enable: true sites: facebook,twitter,wechat,weibo,qq addtoany: enable: false item: facebook,twitter,wechat,sina_weibo,facebook_messenger,email,copy_link
sharejs效果图:
8.搜索功能 我真是个脑瘫,这么个功能弄了半天,服了,下次记得看看人家注释写的啥
1.本地搜索 1.安装搜索插件
1 npm install hexo-generator-search --save
2.配置_config.yml
1 2 3 4 5 search: path: search.xml field: post content: true
3.主题配置文件 _config.butterfly.yml:
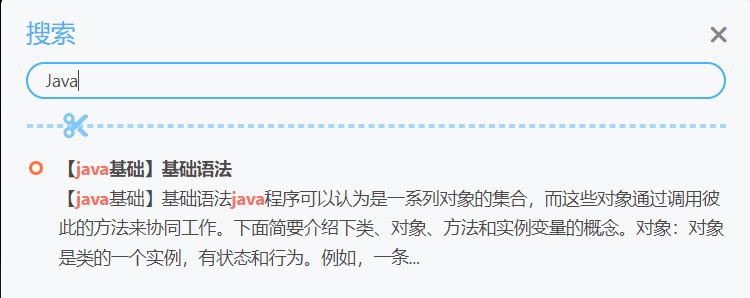
1 2 3 4 5 6 local_search: enable: true labels: input_placeholder: Search for Posts hits_empty: "We didn't find any results for the search: ${query}"
效果图 :
顺带一提文章必须得有title,不然的话似乎本地搜索不会将其放进搜索范围?反正我有一篇没写标题就死活搜不到
2.笔者踩得坑,还是看一下吧,毕竟我下的是最新的hexo,后面的大概和我的一样 下面给你们看看笔者的,以及为什么笔者弄了一下午没弄好一个搜索功能,这个是
1
2
3
4
5
6
7
8
9
10
11
12
13
14
15
16
17
18
19
20
21
22
23
24
25
26
27
28
29
30
31
32
33
34
35
36
37
38
39
40
search: use: local_search local_search: enable: true hits: per_page: 10 labels: input_placeholder: Search for Posts hits_empty: "我们没有找到任何搜索结果: ${query}" hits_stats: "找到${hits}条结果(用时${time} ms)" preload: true trigger: manual top_n_per_article: -1 unescape: true CDN: algolia_search: enable: false hits: per_page: 10 labels: input_placeholder: Search for Posts hits_empty: "我们没有找到任何搜索结果: ${query}" hits_stats: "找到${hits}条结果(用时${time} ms)" docsearch: appId: apiKey: indexName: option:
没错,你用哪个方式,你得写出来,不写出来就相当于没有启用搜索功能,所以肯定没有搜索的图标
3.Algolia Search 想用Algolia Search的可以去看这篇博客,就是新手教程麻烦点,剩下的配的挺快的
基于 Hexo 键入搜索功能 | 唐志远
9.版权、文章内容复制、文章链接 修改主题配置文件_config.butterfly.yml
1.复制的内容后面加上版权信息 1 2 3 4 5 6 7 copy: enable: true copyright: enable: true limit_count: 50
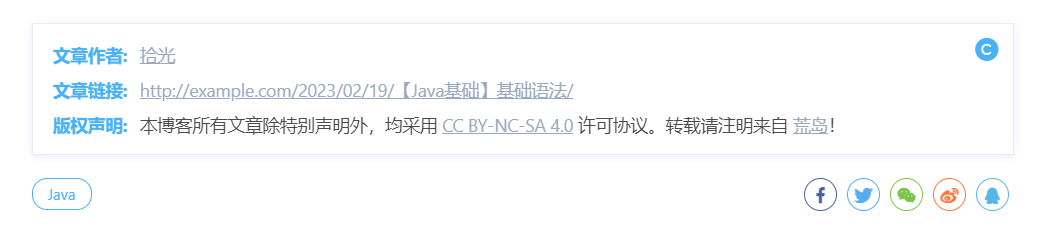
2.文章版权信息 1 2 3 4 5 post_copyright: enable: true decode: true license: CC BY-NC-SA 4.0 license_url: https://creativecommons.org/licenses/by-nc-sa/4.0/
效果图:
如果有文章(例如:转载文章)不需要显示版权,可以在文章页 Front-matter 中单独设置。
(front-matter和上传博客有关,下个博客我来讲讲这个东西,当然要是我没学会的话就要鸽掉了)
从 v3.0.0 开始,支持对单独文章设置版权信息,可以在文章 Front-matter 单独设置。
1 2 3 4 5 post_copyright: copyright_author: xxxx copyright_author_href: https://xxxxxx.com copyright_url: https://xxxxxx.com copyright_info: 此文章版权归xxxxx所有,如有转载,请註明来自原作者
3.生成文章唯一链接 Hexo的默认文章链接格式是年,月,日,标题这种格式来生成的。如果你的标题是中文的话,那你的URL链接就会包含中文。
1 permalink: :year/:month/:day/:title
前往你的Hexo博客根目录,打开cmd命令窗口执行
1 npm install hexo-abbrlink --save
修改站点配置文件_config.yml中permalink属性。
1 2 3 4 5 6 permalink: :year/:month/:day/:title/ permalink: post/:abbrlink.html abbrlink: alg: crc32 rep: hex
这个笔者没试,原来的感觉够用,就只是在URL这个部分把自己的网站贴上去了,其他的没管,我发现文章下面的连接可以跳转到自己的博客了,就好了感觉
1 2 3 4 5 6 7 8 url: https://darling-123456.github.io/ permalink: :year/:month/:day/:title/ permalink_defaults: pretty_urls: trailing_index: true trailing_html: true
就像这样变成我自己的网站,看着也舒服一点
10.toc 修改主题配置文件_config.butterfly.yml。
1 2 3 4 5 6 7 toc: post: true page: true number: true expand: false style_simple: false scroll_percent: true
属性
解释
post
文章页是否显示 TOC
page
普通页面是否显示 TOC
number
是否显示章节数
expand
是否展开 TOC
style_simple
简洁模式(侧边栏只显示 TOC, 只对文章页有效 )
scroll_percent
是否显示滚动进度百分比
为特定的文章配置 在你的文章md文件的头部,加入toc_number和toc,并配置true或者false即可。
主题会优先判断文章 Markdown 的Front-matter是否有配置,如有,则以Front-matter的配置为准。否则,以主题配置文件中的配置为准。
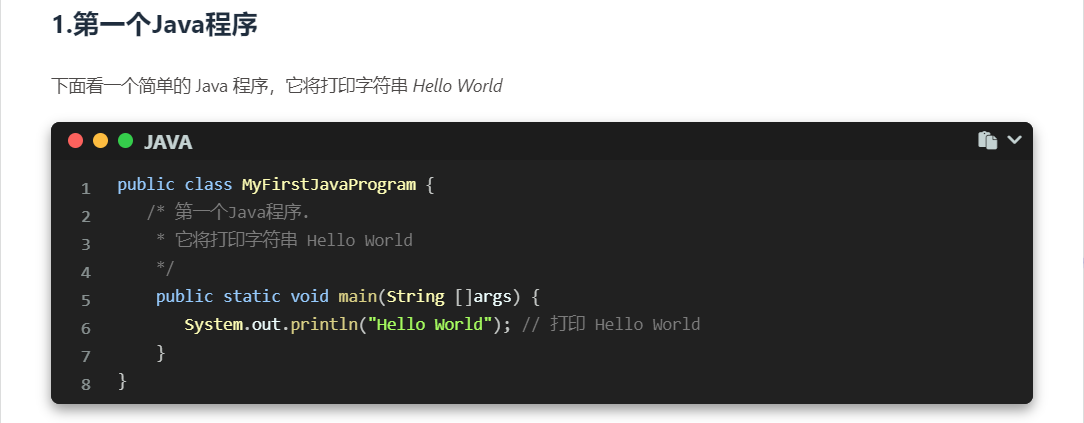
11.代码块设置 别人的
在_config.butterfly.yml配置文件中可以配置如下功能。
1 2 3 4 5 6 highlight_theme: mac highlight_copy: true highlight_lang: false highlight_shrink: false highlight_height_limit: false code_word_wrap: true
同时将站点配置文件_config.yml的highlight设置为false。
1 2 3 4 highlight: enable: false line_number: false auto_detect: false
效果图 :
别人的不对来看看笔者的 去_config.butterfly.yml找code_blocks:
1 2 3 4 5 6 7 8 9 10 11 12 13 14 code_blocks: theme: ocean macStyle: false height_limit: false word_wrap: true copy: true language: true shrink: false fullpage: false
12.相关文章 在文章最下面出现推送
1 2 3 4 5 related_post: enable: true limit: 6 date_type: created
13.打赏 给文章结尾设置打赏按钮,可以放上收款二维码
1 2 3 4 5 6 7 8 9 10 11 reward: enable: true QR_code: - img: /img/wechat.jpg link: text: 微信 - img: /img/alipay.jpg link: text: 支付宝 12345678910
这个不是笔者(嘻
14.文章页面 笔者只弄了meta,剩下的没弄,有的不知道啥意思,有的感觉没用,你们想弄的话可以试试
1 2 3 4 5 6 7 8 9 10 11 12 13 post_meta: page: date_type: both date_format: relative categories: true tags: true label: true post: date_type: both date_format: relative categories: true tags: true label: true
文章锚点 开启文章锚点后,当你在文章页进行滚动时,文章链接会根据标题 ID 进行替换。
注意:每替换一次,会留下一个歷史记录。所以如果一篇文章有很多锚点的话,网页的歷史记录会很多。
修改主题配置文件_config.butterfly.yml。
1 2 3 4 yml # anchor # when you scroll in post , the url will update according to header id. anchor: true
文章过期提醒 可设置是否显示文章过期提醒,以更新时间为基准。
1 2 3 4 5 6 7 8 9 markdown # Displays outdated notice for a post (文章过期提醒) noticeOutdate: enable: true style: flat # style: simple/flat limit_day: 365 # When will it be shown position: top # position: top/bottom message_prev: It has been message_next: days since the last update, the content of the article may be outdated.
limit_day: 距离更新时间多少天才显示文章过期提醒。message_prev : 天数之前的文字。message_next:天数之后的文字。
文章分页按钮 修改主题配置文件_config.butterfly.yml。
1 2 3 4 5 6 7 yml # post_pagination (分页) # value: 1 || 2 || false # 1: The 'next post' will link to old post # 2: The 'next post' will link to new post # false: disable pagination post_pagination: false
参数
解释
post_pagination: false
关闭分页按钮
post_pagination: 1
下一篇显示的是旧文章
post_pagination: 2
下一篇显示的是新文章
15.图片放大功能 在_config.butterfly.fly修改以下内容
1 2 3 4 5 6 7 8 9 10 11 12 13 lightbox: medium_zoom medium_zoom: enable : true delay: 300 margin: 80
修改后重新部署即可
16.inject
v2.3.0 以上支持。
如想添加额外的 js/css/meta 等等东西,可以在 Inject 里添加,head (</body> 标签之前), bottom (</html> 标签之前)。
1 2 3 4 5 6 7 8 9 yml # Inject # Insert the code to head (before '</head>' tag) and the bottom (before '</body>' tag) # 插入代码到头部 </head> 之前 和 底部 </body> 之前 inject: head: - <link rel="stylesheet" href="/xxx.css"> bottom: - <script src="xxxx"></script>
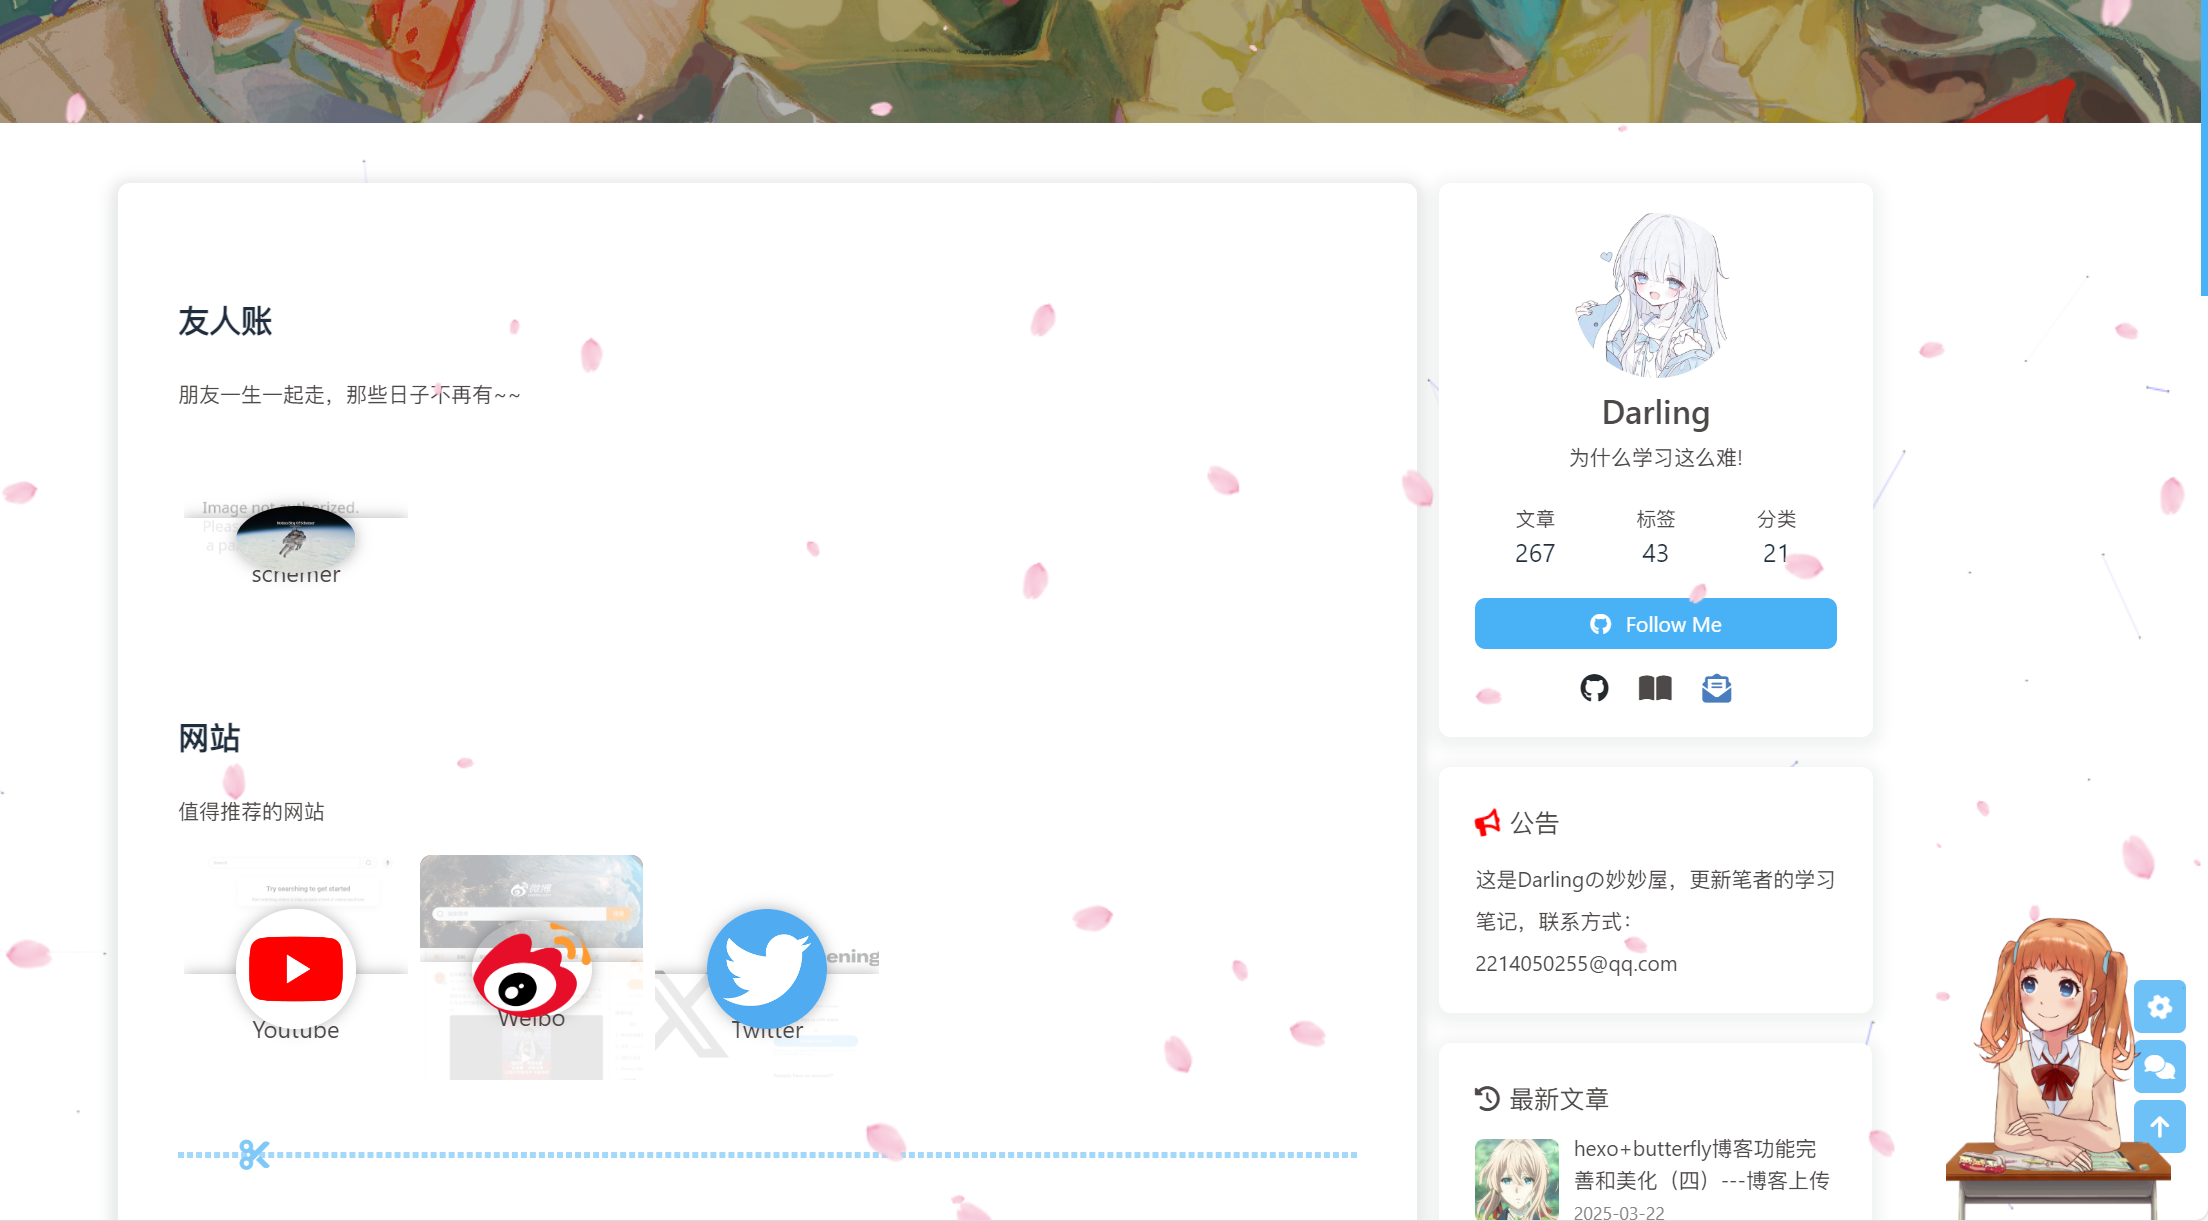
17.友情链接页面
在 Hexo 博客根目录 [Blogroot]下打开终端,输入
打开[Blogroot]\source\link\index.md,添加一行type: 'link':
1 2 3 4 5 6 7 --- title: 友链 date: 2025-03-21 21:23:14 type: "link" top_img: /img/link.jpg comments: true ---
新建文件[Blogroot]\source\_data\link.yml,没有_data文件夹的话也请自己新建。以下是默认友链格式示例。
打开[Blogroot]\source\_data\link.yml,输入以下内容,可以自己改,但是一定要写flink_style: flexcard,不写的话会报错的,这是和原来版本不同的地方
1 2 3 4 5 6 7 8 9 10 11 12 13 14 15 16 17 18 19 20 21 22 23 24 25 26 27 - class_name: 友人账 flink_style: flexcard class_desc: 朋友一生一起走,那些日子不再有~~ link_list: - name: schemer link: https://www.schemer.top/ avatar: /img/schemer.jpg descr: schemerの妙妙屋 - class_name: 网站 flink_style: flexcard class_desc: 值得推荐的网站 link_list: - name: Youtube link: https://www.youtube.com/ avatar: https://i.loli.net/2020/05/14/9ZkGg8v3azHJfM1.png descr: 视频网站 - name: Weibo link: https://www.weibo.com/ avatar: https://i.loli.net/2020/05/14/TLJBum386vcnI1P.png descr: 中国最大社交分享平台 - name: Twitter link: https://twitter.com/ avatar: https://i.loli.net/2020/05/14/5VyHPQqR6LWF39a.png descr: 社交分享平台
取消[Blogroot]\_config.butterfly.yml中menu配置项内link页面的注释。
1 2 3 4 5 6 7 8 9 10 menu: Home: / || fas fa-home Archives: /archives/ || fas fa-archive Tags: /tags/ || fas fa-tags Categories: /categories/ || fas fa-folder-open Link: /link/ || fas fa-link
替换[Blogroot]\themes\butterfly\layout\includes\page\flink.pug
1 2 3 4 5 6 7 8 9 10 11 12 13 14 15 16 17 18 19 20 21 22 23 24 25 26 27 28 29 30 31 32 33 34 35 36 37 38 39 40 if top_img === false h1.page-title= page.title .flink if site.data.link each i in site.data.link if i.class_name h2!= i.class_name if i.class_desc .flink-desc!=i.class_desc if i.flink_style === 'butterfly' .butterfly-flink-list each item in i.link_list .flink-list-item a(href=url_for(item.link) title=item.name target="_blank") .flink-item-icon if theme.lazyload.enable img(data-lazy-src=url_for(item.avatar) onerror=`this.onerror=null;this.src='` + url_for(theme.error_img.flink) + `'` alt=item.name ) else img(src=url_for(item.avatar) onerror=`this.onerror=null;this.src='` + url_for(theme.error_img.flink) + `'` alt=item.name ) .flink-item-info .flink-item-name= item.name .flink-item-desc(title=item.descr)= item.descr else if i.flink_style === 'flexcard' .flexcard-flink-list each item in i.link_list a.flink-list-card(href=url_for(item.link) target='_blank' data-title=item.descr) .wrapper.cover - var siteshot = item.siteshot ? url_for(item.siteshot) : 'https://image.thum.io/get/width/400/crop/800/allowJPG/wait/20/noanimate/' + item.link if theme.lazyload.enable img.cover.fadeIn(data-lazy-src=siteshot onerror=`this.onerror=null;this.src='` + url_for(theme.error_img.post_page) + `'` alt='' ) else img.cover.fadeIn(src=siteshot onerror=`this.onerror=null;this.src='` + url_for(theme.error_img.post_page) + `'` alt='' ) .info if theme.lazyload.enable img.flink-avatar(data-lazy-src=url_for(item.avatar) onerror=`this.onerror=null;this.src='` + url_for(theme.error_img.flink) + `'` alt='' ) else img(src=url_for(item.avatar) onerror=`this.onerror=null;this.src='` + url_for(theme.error_img.flink) + `'` alt='' ) span.flink-sitename= item.name != page.content
替换[Blogroot]\themes\butterfly\source\css\_page\flink.styl
1 2 3 4 5 6 7 8 9 10 11 12 13 14 15 16 17 18 19 20 21 22 23 24 25 26 27 28 29 30 31 32 33 34 35 36 37 38 39 40 41 42 43 44 45 46 47 48 49 50 51 52 53 54 55 56 57 58 59 60 61 62 63 64 65 66 67 68 69 70 71 72 73 74 75 76 77 78 79 80 81 82 83 84 85 86 87 88 89 90 91 92 93 94 95 96 97 98 99 100 101 102 103 104 105 106 107 108 109 110 111 112 113 114 115 116 117 118 119 120 121 122 123 124 125 126 127 128 129 130 131 132 133 134 135 136 137 138 139 140 141 142 143 144 145 146 147 148 149 150 151 152 153 154 155 156 157 158 159 160 161 162 163 164 165 166 167 168 169 170 171 172 173 174 175 176 177 178 179 180 181 182 183 184 185 186 187 188 189 190 191 192 193 194 195 196 197 198 199 200 201 202 203 204 205 206 207 208 209 210 211 212 213 214 215 216 217 218 219 220 221 222 223 224 225 226 227 228 229 230 231 232 233 234 235 236 237 .flink-desc margin: .2rem 0 .5rem .butterfly-flink-list overflow: auto padding: 10px 10px 0 text-align: center & > .flink-list-item position: relative float: left overflow: hidden line-height: 17px -webkit-transform: translateZ(0) height: 100px; padding: 10px; width: calc(100% / 5 - 0. 5rem) margin: 0. 5rem 0. 25rem; border-radius: 12px; border: var(--style-border); background-color: var(--anzhiyu-card-bg); -webkit-transition: all .3s ease-in-out; -moz-transition: all .3s ease-in-out; -o-transition: all .3s ease-in-out; -ms-transition: all .3s ease-in-out; transition: all .3s ease-in-out; +maxWidth1200() width: calc(50% - 15px) !important +maxWidth600() width: calc(100% - 15px) !important &:hover border-color: var(--anzhiyu-main)!important; background-color: var(--anzhiyu-main)!important; box-shadow: var(--anzhiyu-shadow-theme)!important; .flink-item-icon width: 0 ; height: 0 ; margin-left: -10px; .flink-item-name,.flink-item-desc color: var(--anzhiyu-white); &:hover:before, &:focus:before, &:active:before transform: scale(1) a color: var(--font-color) text-decoration: none .flink-item-icon float: left overflow: hidden margin: 15px 10px width: 60px height: 60px border-radius: 35px transition: all .3s ease-out margin: 8px 0 8px 0 ; background: var(--anzhiyu-background); border-radius: 50 %; overflow: hidden; img width: 100 % height: 100 % transition: filter 375ms ease-in .2s, transform .3s object-fit: cover .img-alt display: none .flink-item-info display: flex; flex-wrap: wrap; padding-left: 10px; text-align: left; flex-direction: column; .flink-item-name @extend .limit-one-line padding: 12px 0 16px 0 ; height: auto; font-weight: bold font-size: 1. 2em color: var(--anzhiyu-fontcolor); .flink-item-desc @extend .limit-one-line padding: 0 height: 35px font-size: .93em opacity: .7 ; color: var(--anzhiyu-fontcolor); word-break: break-all; white-space: break-spaces; display: -webkit-box; overflow: hidden; -webkit-box-orient: vertical; -webkit-line-clamp: 2 ; .flink-name margin-bottom: 5px font-weight: bold font-size: 1. 5em margin-bottom: 0. 5rem; object-fit: cover; max-height: 900px; .flexcard-flink-list overflow hidden .flink-list-card .wrapper img transition: transform .5s ease-out !important; &:hover border-color: var(--anzhiyu-main)!important; background-color: var(--anzhiyu-main)!important; box-shadow: var(--anzhiyu-shadow-theme)!important; & > a width: calc(100% / 5 - 0. 5rem); height 150px position relative display block margin: 0. 5rem 0. 25rem; float left overflow hidden padding: 0 ; border-radius: 8px; transition all .3s ease 0s, transform .6s cubic-bezier(.6, .2 , .1 , 1 ) 0s box-shadow none border: var(--style-border)!important; &:hover .info transform translateY(-100%) .wrapper img transform scale(1.2) &::before position: fixed width:inherit margin:auto left:0 right:0 top:10% border-radius: 10px text-align: center z-index: 100 content: attr(data-title) font-size: 20px color: padding: 10px background-color: rgba($theme-color,0.8) .cover width 100 % transition transform .5s ease-out .wrapper position relative .fadeIn animation coverIn .8s ease-out forwards img height 150px pointer-events none .info display flex flex-direction column justify-content center align-items center width 100 % height 100 % overflow hidden border-radius 3px background-color hsla(0, 0 %, 100 %, .7 ) transition transform .5s cubic-bezier(.6, .2 , .1 , 1 ) 0s img position relative top 45px width 80px height 80px border-radius 50 % box-shadow 0 0 10px rgba(0, 0 , 0 , .3 ) z-index 1 text-align center pointer-events none span padding 20px 10 % 60px 10 % font-size 16px width 100 % text-align center box-shadow 0 0 10px rgba(0, 0 , 0 , .3 ) background-color hsla(0, 0 %, 100 %, .7 ) color var(--font-color) white-space nowrap overflow hidden text-overflow ellipsis .flexcard-flink-list>a .info, .flexcard-flink-list>a .wrapper .cover position absolute top 0 left 0 @media screen and (max-width:1024px) .flexcard-flink-list & > a width calc(33.33333% - 15px) @media screen and (max-width:600px) .flexcard-flink-list & > a width calc(50% - 15px) [data-theme=dark ] .flexcard-flink-list a .info, .flexcard-flink-list a .info span background-color rgba(0, 0 , 0 , .6 ) .flexcard-flink-list & > a &:hover &:before background-color: rgba(#121212,0.8); .justified-gallery > div > img, .justified-gallery > figure > img, .justified-gallery > a > a > img, .justified-gallery > div > a > img, .justified-gallery > figure > a > img, .justified-gallery > a > svg, .justified-gallery > div > svg, .justified-gallery > figure > svg, .justified-gallery > a > a > svg, .justified-gallery > div > a > svg, .justified-gallery > figure > a > svg position static!important
相比店长原教程修改处为不需要在主题配置文件中添加配置项,而是需要在source/_data/link.yml添加配置项
1 flink_style: flexcard || butterfly
该参数可选值flexcard或者butterfly分别对应两种样式。
可能遇到的 bug:使用flexcard样式时,因为全站字体大小配置与本站不一致的关系,可能导致友链卡片的头像位置偏移较大。请读者按照flink.styl里的注释内容自己微调。
效果展示
18.美化(二)结语 到此就基本告一段落了,网站已经基本成型了,该有的也都有了
后续看笔者精力再加入自定义字体样式和大小(我弄了但是没弄成)、图片点击放大、评论区、在线聊天、友链之类的功能吧
尽量这周把如何上传博客给大家更新出来(但是今天耽搁一天考研的东西还没学(悲 )
这是笔者做完上述功能和美化后的,欢迎大家来访问
Darling的妙妙屋
博客也就是为了测试功能随便传了两篇,后续我去试试在本地hexo上传再加hexo d部署和用git直接传到github有啥区别,感觉应该是一样的,如果只是上传博客的话,我完了试试再说
(当然我测试传的那篇就是git使用,感兴趣的可以看看)


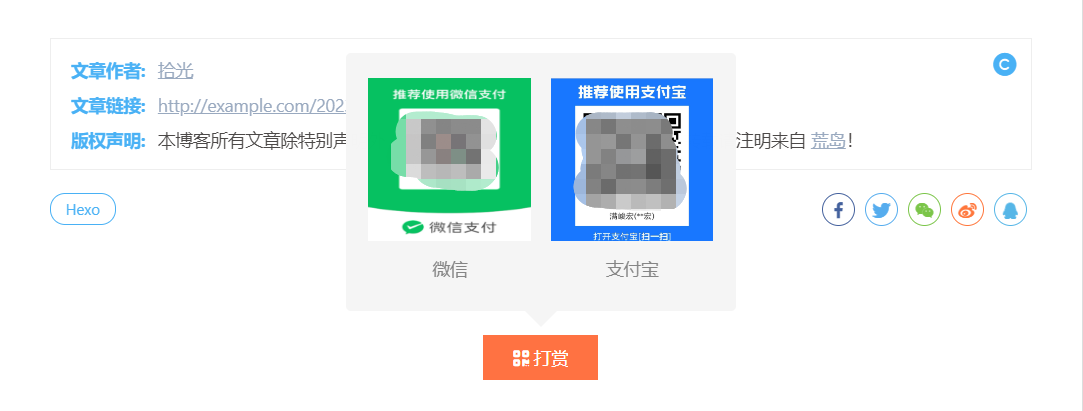
 微信
微信 支付宝
支付宝